
Microsoft recently released a Disk Cleanup Wizard addon/plugin/hotfix (all three names are used in the KB article) that allows users to delete outdated Windows updates on computers running Windows 7 SP1.
http://support.microsoft.com/kb/2852386
“This update adds a new plugin to the Disk Cleanup wizard. After you install this update, you can use the Windows Update Cleanup option to delete Windows updates that you no longer need.”
I decided to see just how effective this plugin is when reclaiming disk space. To this end I choose a test PC that has been running Windows 7 Pro since October of 2009 with the pre-service pack 1 updates, then service pack 1 was installed and over the past 33 months all the “Important” Windows Updates that were available installed. Note: This is basically a clean installation with no additional software installed except for one utility.
Before I installed the Disk Cleanup plugin (KB2852386):
1) I installed the latest “Important” Windows Updates. No “Optional updates” were installed.
2) I then created an image backup to use as my pre-plugin baseline.
3) Then I ran Disk Cleanup to delete as much junk as possible.
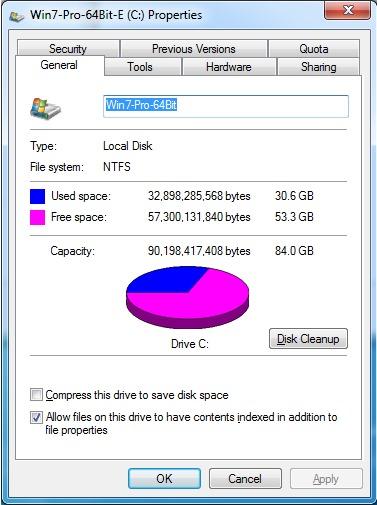
4) Then I checked the amount of used disk space.
Next, I installed the file I had downloaded (64Bit version) from the link in KB2852386.
Notes:
1) You can also obtain this plugin from the list “Optional” updates when you run Live Update.
2) After installing the plugin, if you are not prompted to restart your PC, do so now.
Run the Disk Cleanup utility:
Notes:
a) You must have administrator permissions to clean up Windows update files.
b) If you are already receiving Low Disk Space notification, click the notification to open the Disk Cleanup wizard and go to step 2.
1) Start the Disk Cleanup wizard. Click Start, click ‘All Programs’, click ‘Accessories’, click ‘System Tools’, and then click ‘Disk Cleanup’.
2) Select the Windows 7 system drive, and then click OK.Note: This operation might take several seconds because the Disk Cleanup wizard searches for files on the drive that can be cleaned up.
3a) If the Windows Update Cleanup option is not displayed on the Disk Cleanup tab, click ‘Clean up system files’ button.
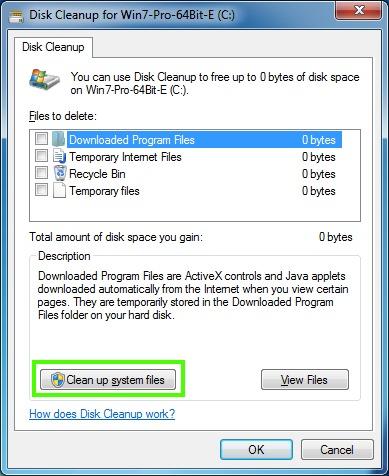
3b) If the Windows Update Cleanup option is displayed on the Disk Cleanup tab; go to step 5.
4) Select the Windows 7 system drive, and then click OK.
5) On the Disk Cleanup tab, select Windows Update Cleanup, and then click OK.
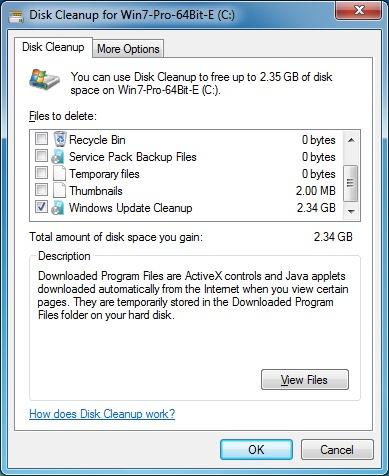
Note: By default, the Windows Update Cleanup option is already selected, you may need to move the slider down to see this option. However, you should remove the checkmarks from all the other options to get an accurate result of the total amount of disk space that will be freed up and available for use.
6) When a dialog box appears, click Delete Files. This may take several minutes to complete.
7) After the operation has been completed; restart/reboot your computer to finish the cleanup process.
8) Launch Windows Explorer, then right-click on the Windows partition drive letter and select ‘Properties’ to see just how much free space in now available.
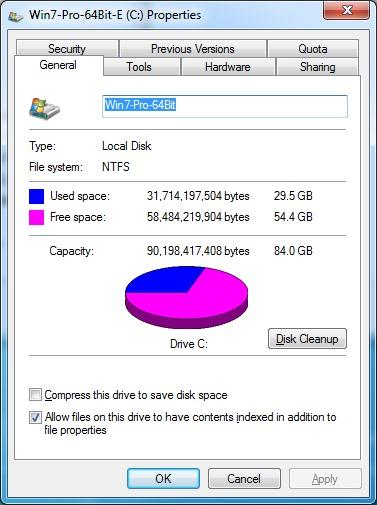
I saved 2.34GB on my PC, that’s a lot of obsolete Windows Updates.
For users who have 500MB a 500GB or larger hard drives, this isn’t much space but for users who have Solid State Drives with a smaller capacity this is a sign of space to free up. Hard drive users may want to run the Windows ‘Disk Defragmenter’, this isn’t necessary if you have an SSD.